Here’s another ‘temple of Mars’ building but, this time, it’s a ruin.
I started with another 6" square vinyl floor tile, an offcut of 4mm MDF and yet another upside-down coleslaw tub. I sliced off the bottom of the tub and kept the offcut for later use as rubble, then marked out the shape of the floor and entrance on the MDF. If you look at my previous temple buildings, you will see the entrances are raised slightly above ground level, so the size of the floor needs to be slightly less than the width of the coleslaw tub.
Here is the floor cut to size, with a few more offcuts glued together to make the entrance tunnel:
I added two more offcuts to complete the first interior wall. The edges of MDF buildings, especially the laser-cut ones, can look very austere so I sanded the top of the wall and the outer edges of the entrance tunnel to soften them:
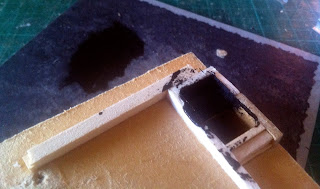
I glued two batons of wood under the floor to raise it to the correct height. Before that, I cut a square out of the MDF so that I could add a flight of steps leading downward, because every creepy temple should have one. The two thin pieces of wood at the bottom of the photograph below are to box in the area I've created and hide that the steps don’t actually go anywhere.
Here are the remaining three interior walls, plus a dividing wall to split the temple into two rooms:
And here is the staircase. It’s too difficult to cut tiny pieces of wood to the correct length so I don’t even try. Instead I assemble the various lengths and then sand the staircase to the correct width.
Below are the walls and staircase, in position. The three steps are glued to the side of 4mm thick floor so that the thickness of the MDF forms a fourth step.
I would never be able to reach the area under the floor with a brush once the building was constructed. That done, I glued the building interior to the tile:
Then added the coleslaw tub exterior:
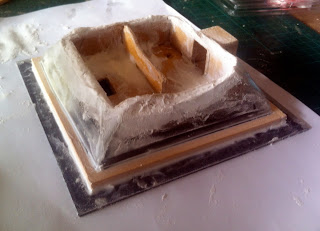
And it was finally starting to look like a building. Now here is where things went awry! Having been impressed by Eric the Shed’s cliff-making project, my plan from the outset was to use the remainder of a can of expanding foam filler to plug the gap between the outer and inner walls then cut off the excess foam with a knife. Unfortunately, I had stored the can for too long and the foam had gone off. When I finally got some liquid out of the spray can it then took an age for it to expand. I gave up on it and fell back on plugging the gaps with a tube of grab adhesive, which I often employ as a filler rather than a glue. Below you can see that I added the first baton of wood to the outside, then held together the coleslaw tub with elastic bands until the grab adhesive had set. You can also see a few yellow blobs of the foam filler which, at this point, should have set but was still slowly expanding and making the outer wall bow out slightly.
The following day, I added the remaining batons of wood and filled the gaps between the wood and the tub with more grab adhesive:
I also added more adhesive to the gaps between the inner and outer walls to hide the thin edge of the plastic tub, and to the floor of the interior to build up a layer that I could later cover with rubble:
A day later, I painted the building with PVA mixed with a drop of washing-up liquid and sprinkled sand all over it:
I have no photographs of the next few stages because they were all out of focus. I washed the sand with a PVA and water mix to seal it. Then I added some of the distinctive corners from the discarded bottom of the coleslaw box to the interior, to make it look like the roof had at some point collapsed or been destroyed. I covered these corners with a layer of sand to match the rest of the outer walls, then added a second layer of ballast and sand as rubble.
Over a week later, I got around to painting it! The two shots of the interior below show the staircase. I added some ballast to the foot of the staircase to try and make it look like the stairwell had been blocked by rubble from the collapsed roof.
Here is the building from the front:
And from above:
I’ll leave you with a shot of the four buildings I now have:
And another of the four buildings in situ on my desert terrain tiles:
I’m currently finishing off a bunch of desert hills (which I started in 2010 then forgot about...) then I'll start on the centrepiece, which will be a two-tiered building in a similar style to the small temple buildings but twice the size of them. There will also be some kind of interior, since it will have a larger enough footprint to justify it. What I really need a bunch of Ground Zero Games astronauts, but that isn’t going to happen until one of my clients pays their bills...
I started with another 6" square vinyl floor tile, an offcut of 4mm MDF and yet another upside-down coleslaw tub. I sliced off the bottom of the tub and kept the offcut for later use as rubble, then marked out the shape of the floor and entrance on the MDF. If you look at my previous temple buildings, you will see the entrances are raised slightly above ground level, so the size of the floor needs to be slightly less than the width of the coleslaw tub.
Here is the floor cut to size, with a few more offcuts glued together to make the entrance tunnel:
I added two more offcuts to complete the first interior wall. The edges of MDF buildings, especially the laser-cut ones, can look very austere so I sanded the top of the wall and the outer edges of the entrance tunnel to soften them:
I glued two batons of wood under the floor to raise it to the correct height. Before that, I cut a square out of the MDF so that I could add a flight of steps leading downward, because every creepy temple should have one. The two thin pieces of wood at the bottom of the photograph below are to box in the area I've created and hide that the steps don’t actually go anywhere.
Here are the remaining three interior walls, plus a dividing wall to split the temple into two rooms:
And here is the staircase. It’s too difficult to cut tiny pieces of wood to the correct length so I don’t even try. Instead I assemble the various lengths and then sand the staircase to the correct width.
Below are the walls and staircase, in position. The three steps are glued to the side of 4mm thick floor so that the thickness of the MDF forms a fourth step.
The next step was just to paint the area at the foot of the steps black:
I would never be able to reach the area under the floor with a brush once the building was constructed. That done, I glued the building interior to the tile:
Then added the coleslaw tub exterior:
And it was finally starting to look like a building. Now here is where things went awry! Having been impressed by Eric the Shed’s cliff-making project, my plan from the outset was to use the remainder of a can of expanding foam filler to plug the gap between the outer and inner walls then cut off the excess foam with a knife. Unfortunately, I had stored the can for too long and the foam had gone off. When I finally got some liquid out of the spray can it then took an age for it to expand. I gave up on it and fell back on plugging the gaps with a tube of grab adhesive, which I often employ as a filler rather than a glue. Below you can see that I added the first baton of wood to the outside, then held together the coleslaw tub with elastic bands until the grab adhesive had set. You can also see a few yellow blobs of the foam filler which, at this point, should have set but was still slowly expanding and making the outer wall bow out slightly.
The following day, I added the remaining batons of wood and filled the gaps between the wood and the tub with more grab adhesive:
I also added more adhesive to the gaps between the inner and outer walls to hide the thin edge of the plastic tub, and to the floor of the interior to build up a layer that I could later cover with rubble:
A day later, I painted the building with PVA mixed with a drop of washing-up liquid and sprinkled sand all over it:
I have no photographs of the next few stages because they were all out of focus. I washed the sand with a PVA and water mix to seal it. Then I added some of the distinctive corners from the discarded bottom of the coleslaw box to the interior, to make it look like the roof had at some point collapsed or been destroyed. I covered these corners with a layer of sand to match the rest of the outer walls, then added a second layer of ballast and sand as rubble.
Over a week later, I got around to painting it! The two shots of the interior below show the staircase. I added some ballast to the foot of the staircase to try and make it look like the stairwell had been blocked by rubble from the collapsed roof.
Here is the building from the front:
And from above:
I’ll leave you with a shot of the four buildings I now have:
And another of the four buildings in situ on my desert terrain tiles:
I’m currently finishing off a bunch of desert hills (which I started in 2010 then forgot about...) then I'll start on the centrepiece, which will be a two-tiered building in a similar style to the small temple buildings but twice the size of them. There will also be some kind of interior, since it will have a larger enough footprint to justify it. What I really need a bunch of Ground Zero Games astronauts, but that isn’t going to happen until one of my clients pays their bills...


Very nice. I might try to adapt that design for something if I can ever get around to making terrain...
ReplyDeleteThanks!
ReplyDeleteGo for it. I doubt I'm saving any money after investing in materials, tools and time, but making your own terrain is the best way to get exactly what you want to see on the table.
Seeing these makes me think about the early years of Stargate ..
ReplyDeleteIt wasn't an influence but, yeah, I see what you mean!
ReplyDeleteGreat series of builds. Well done!
ReplyDelete